This week at ECHO North America we are going to start grafting Avocado (Persea americana), which is one of my favorite species to graft. Check out this time lapse video to see the whole process from seed to sell-able grafted tree! Avocado Grafting Time Lapse | ECHOcommunity.org.
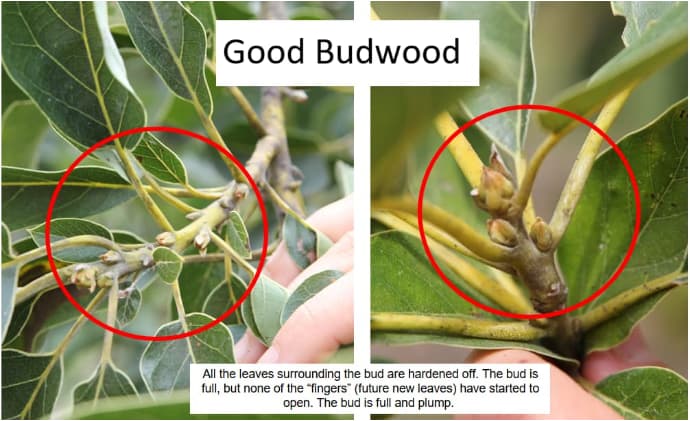
We start every grafting session by selecting good budwood. Check out this post on what makes good or bad budwood Avocado (Persea americana) - Budwood Selection.
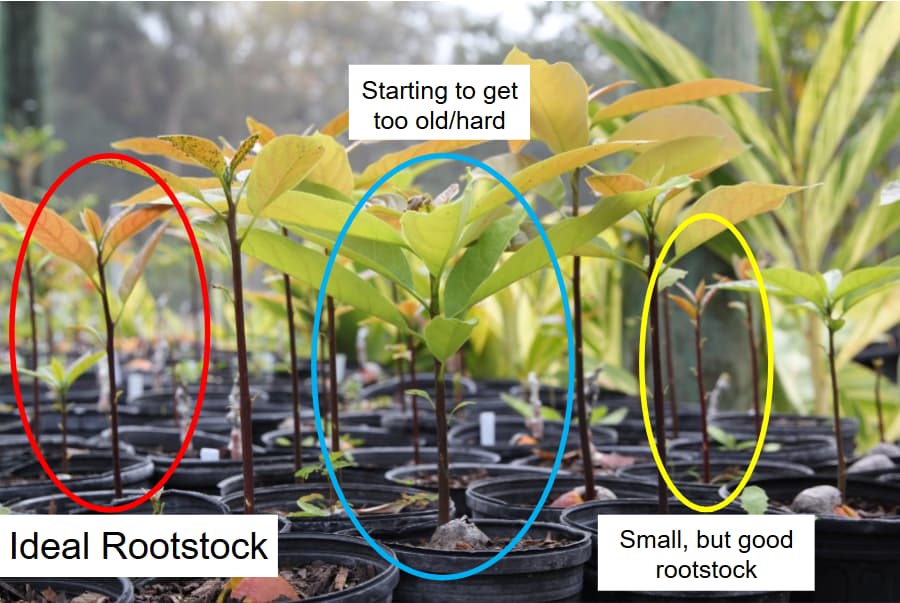
The next key factor for successful Avocado grafting is rootstock selection. We graft onto very young rootstock. It is still purple stemmed and VERY flexible. In the photo below you can see the ideal rootstock stage circled in red; small, but still acceptable rootstock circled in yellow; and circled in blue rootstock that is starting to be past it’s grafting prime, it could still be grafted if needed, especially if you have very thick budwood.
For additional information on how to plant Avocado seeds for rootstock use see this post Avocado (Persea americana) - Seeds for Rootstock.
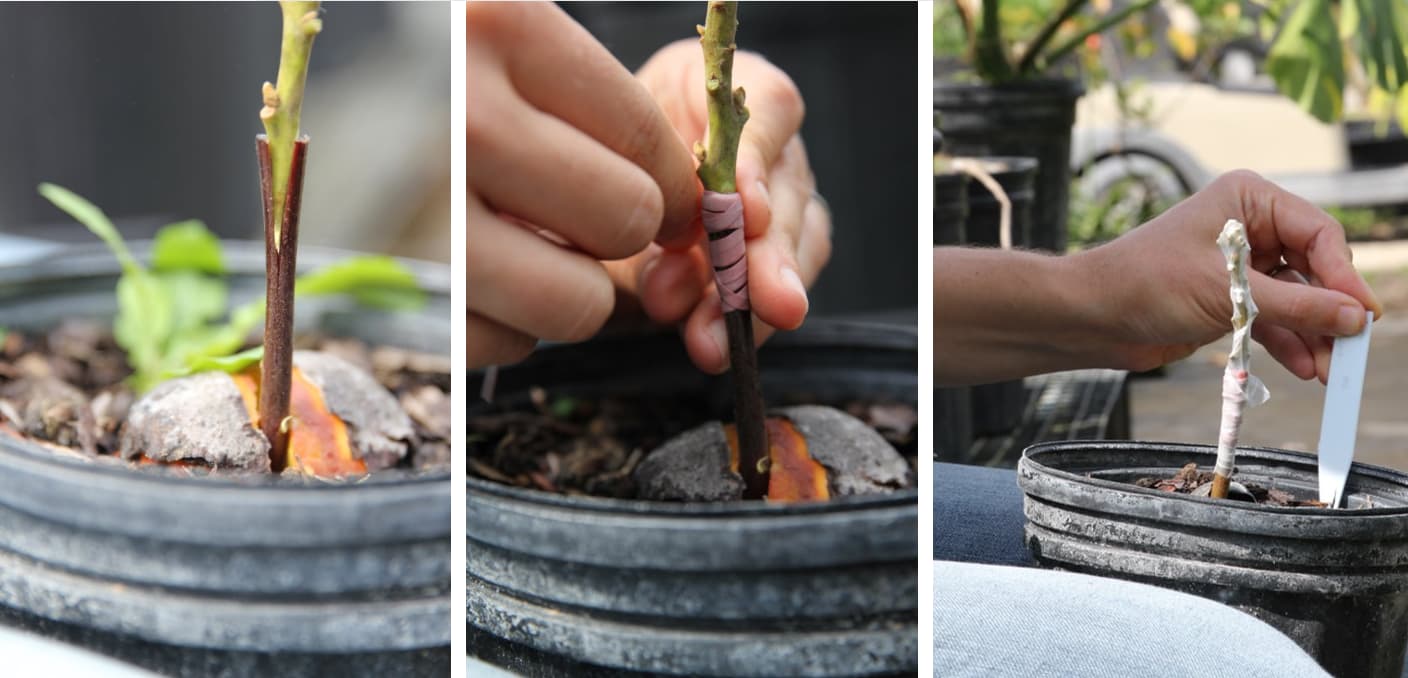
Next step is selecting an avocado rootstock that is the same diameter as your budwood or at least a very close match. For these micro grafts we make our cuts within 5 inches of the seed/soil level. Avocados produce aggressive rootstock sprouts when healing so the lower graft union allows for less rootstock sprouts to manage. When we make the first cut to remove the top of the rootstock we do not leave any leaves below the graft union. The robust seed keeps the young rootstock alive during the quick healing process for avocado. Next we quickly make a clean cut 1.5 in straight down the center of the stem. If your diameters do not quite match up you can shift your cut off center to make a better match.
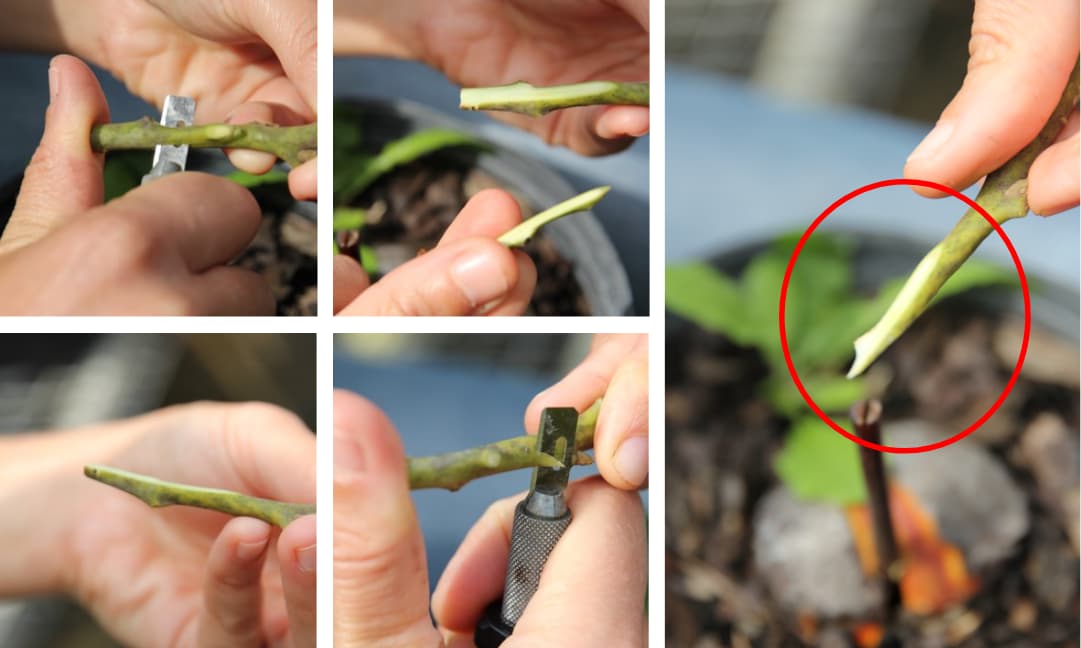
On our budwood we make two cuts about 1.5in long, one on each side of the base. The result is a nice V shape with a fine point (circled in red below). We have found that if the cuts are too short and the angle is too wide then the budwood will be prone to shooting out of the graft union while you are tying it together with the rubber band.
Quickly slide the prepared budwood down into the slit created on the rootstock and secure it with a rubber band or grafting plastic tape. They key here is a tight graft union, which can be initally challenging to achieve because the young plant material is very slippery. If a graft union is particularly challenging a cheating tip is to take a small piece of parafilm and secure it first with that and then wrap the rubber band from the scion down to the rootstock. Once the graft union is secured wrap the entire graft union and scion in parafilm. We always make sure to label our grafts (Species - Variety - Date - Grafter - Comment) so that months later we know what we have.
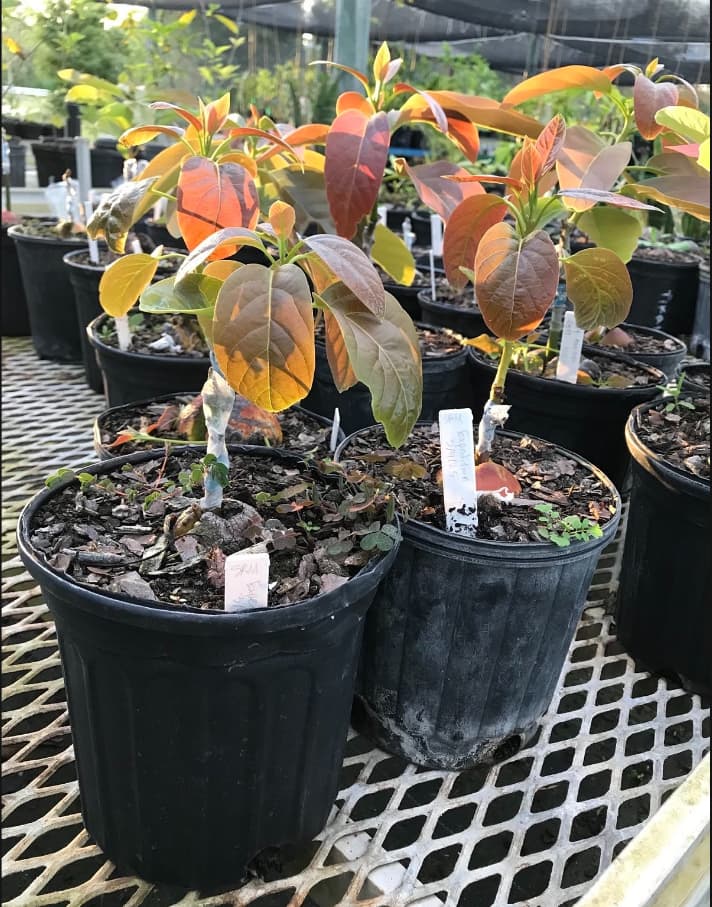
The final step is to place the graft back on the table to heal. Avocado grafts tend to take only a few weeks to push new growth and demonstrate success. If the graft fails then cut off the stem with the graft union and allow the seed to push a new shoot and try again!
Other ECHO Observations on Propagation
1 Like
do these die in cold winters? IF not, how long do they take to fruit?
@craig_soderberg Great questions!
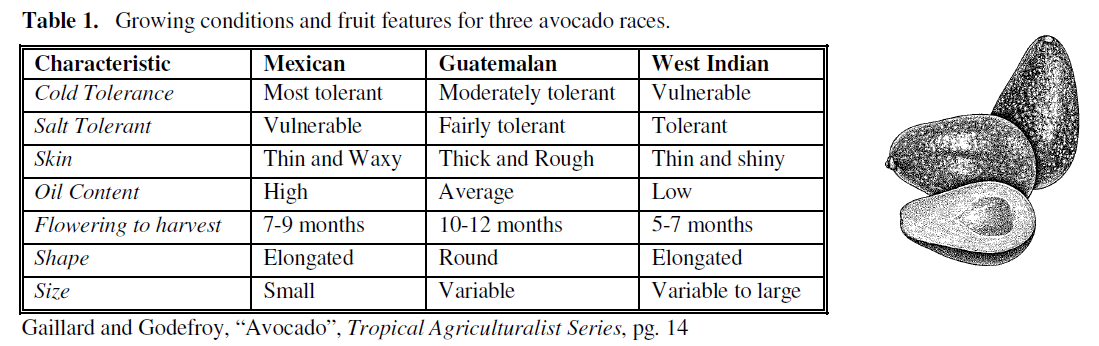
In Florida we graft Avocados using this technique from late-December to mid-April. This timeframe corresponds with when our fall planted rootstock are at the right size and spring budwood in the right stage for grafting. The timing overlaps with our cold season so we keep the rootstock and healing grafts in a shade house which protects them from frost. On freeze nights we will either move our healing grafts to a protected location or add a heater for localized cold protection. Additionally as rootstock we use the avocado variety Lula, a Guatemalan - West Indian cross, because it is cold hardy down to 25°F (-3.8°C) which is rarely reached in our location. By grafting on other cold tolerant varieties we are able to capitalize on this prime, but cold, grafting season. See the table below for various cold tolerance depending on Avocado races.
We have found that these grafts will set fruit in 1 year. Because the trees are so small still at that point we recommend removing most of the fruit set the first year.
Hope this helps. Let us know if you have any other avocado questions!
1 Like
Is it possible to buy these from you?
Once the tree is a certain age is it frost resistant?
Craig
Absolutely! Frost tolerance of Avocados depends on their genetic traits. There are many varieties that are quite cold hardy. Where are you located?
We sell our trees at our Retail Nursery at the ECHO North America in Fort Myers. Visit ECHO - ECHO. Feel free to reach out to us at propagation@echonet.org or call our Retail Nursery at 239.543.3246 if you have specific questions.
I am in the ozark mountains of northern Arkansas.
What are your lowest temperatures?
Very helpful images–thanks! Question: does this same technique work for mangos?
@nathanael_szobody We have not had success with this technique on mangoes. I believe there are some nurseries doing something similar with Mangoes though. Because the Mango seed is so much smaller than an avocado seed the healing process/environment often needs to be much more controlled to be successful with mangos. It is also difficult to find diameters that match since the rootstock sprouts are often quite thin. A micro-side-veneer or chip bud graft might work better for mangoes. If you give it a try please let us know! We would love to see photos if you experiment with it.
1 Like
I have seen it down to the 20s. It might get even colder.
With temperatures like that you will definitely want to look for full Mexican race varieties grafted onto full Mexican race varieties.
Here are a few interesting resources that might give some direction as to what varieties you want to look into and possibly more northern nurseries to source them from. Craig Hepworth might be worth reaching out to. I have heard of him through the rare fruit circles down here, but he is growing Avocados in much colder environments than we are.
@Josh_Jamison Do you have any suggestions?
Thanks so much.
Could I get the phone and email address for Craig Hepworth.
Thanks again and God bless
Craig
I don’t currently have his contact information, but I can work on trying to get it for you.